 |
| Just Plain Old Whipping Cream in the Mixer |
 |
| Watch out - now's the time to cover the mixer! |
 |
| Skip this step & your kitchen will be MESSY! |
 |
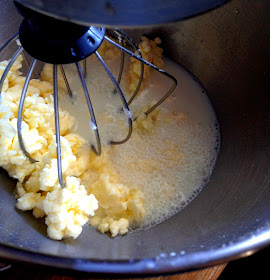
| Finally: the separation happens. |
 |
| Fresh Butter + Buttermilk |
- Pour cream into a chilled mixing bowl.
- With whisk attachment, mix on med-high speed. It'll take about 8 minutes to get to the next step.
- When cream becomes thick/buttery, cover your mixer. It's about to get messy.
- Keep it mixing. When you start to hear sloshing & splashing, you're almost there. Let mix for another 2 minutes.
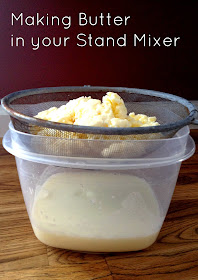
- Uncover mixer, put colander/strainer over another bowl, and drain the liquid (buttermilk) into other container. Return butter to mixing bowl, mix on high for another 2 minutes. You want to remove as much of the buttermilk as possible. This step is to help force the excess liquid out of the butter.
- Strain again. Return butter to mixing bowl, add salt (I added 3/4 tsp for 500mL cream). Mix again for 2 minutes. Strain over sink. If your'e going to use the buttermilk for baking, you don't want to have the now-salted buttermilk added to your stash.

Continue Rinsing Until Water Remains Clear - Rinse out mixing bowl with ice cold water, fill with ice cold water, & kneed the butter in water for several minutes, squeezing to let out trapped buttermilk.
- Dump water, rinse butter, repeat kneading process in fresh ice cold water.
- Repeat step 8. This is to remove as much of the buttermilk as possible from the butter.
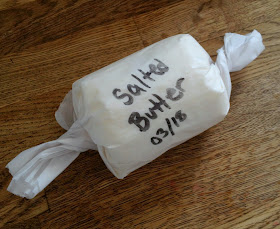
- When water is finally clear/not cloudy, shake off excess water, shape, & wrap to store in fridge. Handle as little as possible with your hands, as you don't want the butter to melt while you're shaping it.
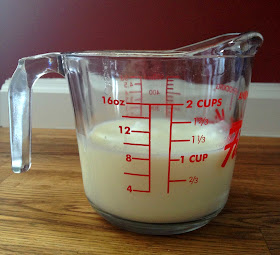
- Refrigerate buttermilk for use in a baking recipe.
Ten steps may seem like a lot, but it really is a quick venture. The longest part about it is waiting for the whipped cream to turn into butter. I advocate walking away for a few minutes. You know how they say a watched pot never boils? As soon as I walked away from the bowl to check Twitter, my butter & buttermilk separated.
I got the cream on quite a good sale. 500mL for $1.60. I ended up with 190g of butter.
A block of butter in the store comes is 454g. Gay LeaButter is on sale at Sobeys this week for $2.95.
If I were to buy 190g of butter from Sobeys at sale price, it would cost me $1.25.
Regular price for this butter at Sobeys is $5.79 - so if I bought 190g of butter at that price, it would cost me $2.36.
If you can find butter on sale for under $3, it's probably cheaper to buy it. However, if butter is not on sale but cream is, it's cheaper to make your own butter. Plus, you get the by-product of buttermilk, which is useful in baking and saves you from buying some or using the milk in your fridge.


I've been thinking of trying to make butter - but I haven't got a mixer. I think I'll go the children with Mason jars route. :)
ReplyDeleteWhat did you end up using the buttermilk for?
Sounds fun - I would do that with my kids, but I fear we'd have jars flying across the room - the kids are only 3 & 1.5 at this point. ;)
DeleteThere's a great recipe on Allrecipes.com for 6 week bran muffins that needs a bunch of buttermilk - worked great in those muffins, we just finished up the batch yesterday!
Heheh butter snob you! Sadly I do not have a fancy mixer like yours so will have to keep buying my butter (for now).
ReplyDeleteInteresting. I've never thought about making my own butter and don't have a mixer either. I'm happy with margarine and only use it every now and then for baking.
ReplyDeleteI used to be just fine with margarine! And then, I married a guy who would ONLY eat butter, and I've totally been converted. ;)
DeleteOh I love real butter, and i believe it to be healthier than the so-called healthy spreads and margarine. My dad was a milkman when i was a little girl and i remember him bringing home cream and making butter with it :)
ReplyDeleteI totally agree with you, I think that butter is WAY healthier than margarine! The fact that it can be made at home in 10 minutes with just one ingredient - it HAS to be! :)
DeleteThat's fantastic - I kinda really wish that we had a Milkman (and an eggman) - now that we're getting farmshare veggie boxes delivered to our house, I never want to go shopping again! ;)
I ... didn't know that buttermilk with the byproduct of making butter. How much of a noob does this make me?
ReplyDeleteCourtney, I didn't know that buttermilk was a byproduct of butter, either, until I started reading up on this! Don't feel too out of it. ;)
DeleteI have done this by accident. Never on purpose.
ReplyDeleteWhat is it that Miss Frizzle says... "Time to get mess, take chances, and make mistakes!" that's how we learn how to do things I guess sometimes, hey Kyla? :)
DeleteI think I want to try this once just for the heck of it!
ReplyDeleteDo it! It's so much fun! And it makes you feel sooo talented! :D
DeleteI want to try this..........thank you for explaining it so nicely. :)
ReplyDeleteMy pleasure, Joy - let us know how it works out for you! :)
DeleteAbout how long do you think it will stay fresh?
ReplyDeleteI read that it will stay fresh for a couple weeks in your fridge if you're careful to get ALL of the buttermilk out. Ours was consumed within 4 days, so I can't speak to it personally. ;)
Delete